Measurement of thermal conductivity by the guarded hot plate method on aluminum honeycomb structures
Posté le 18 March 2021 dans News
The objective of the study was to measure the apparent thermal conductivity of an aluminum honeycomb structure used to transport nuclear fuel.
Aluminum is very conductive (λ= 110 to 180 Wm-1.K-1 depending on the aluminum shades) but the structure glued with epoxy glue does not make it possible to predict the value of the effective conductivity depending on the process manufacturing and bonding. The choice was to develop a method inspired by the guarded hot plate capable of adapting to a tube furnace.
Measuring principle:
The thermal conductivity of a material quantifies its capacity to transmit heat. This property varies depending on the temperature and the composition of the material.
The reference method is the guarded hot plate method.
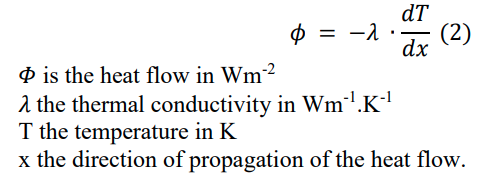
Conductivity is a thermal property which is defined as being the coefficient of proportionality between the heat flux and the temperature gradient:

When the heat transfers are in one direction the choice is to transcribe in 1D these transfers this heat. The heat equation is therefore written in the following form:
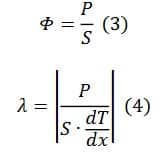
If the heat source is a power P uniformly distributed over a surface S we have:
The method consists in creating a unidirectional flow. This is possible by placing the sample between two isothermal planes of different temperatures.
The problem with steady state measurement is heat loss. To avoid this we reduce the losses either by using a fine sample so that the losses are negligible, or by using a guard (figure 1):
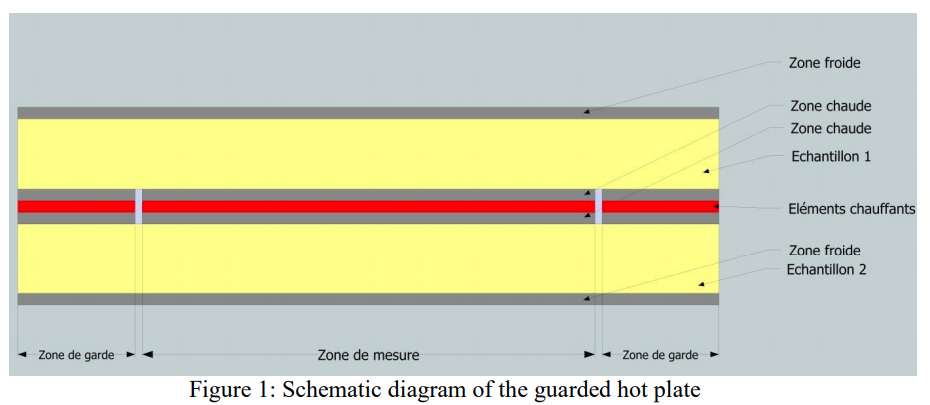
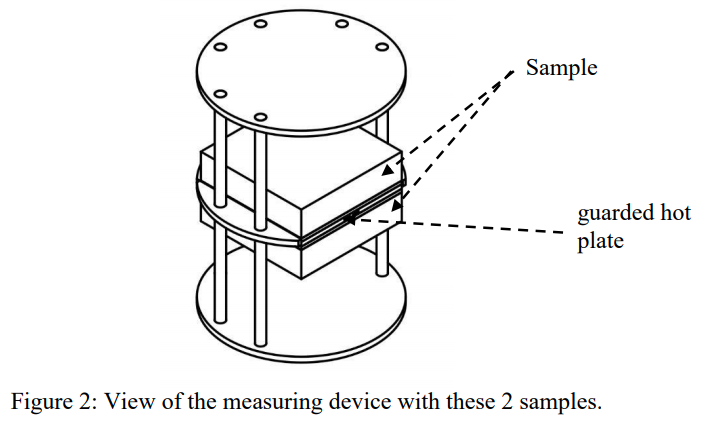
We use 2 identical samples and submit them to a 1D flow in a measurement zone surrounded by a guard zone. Samples are generally square. The advantage of having 2 identical samples is to avoid a thermal guard at the back of the hot plane.
It is also possible to use only one sample when the samples are not thermally identical.
The measurement and guard zones are separated by a gap.
The device used must be able to fit into a tube furnace.
Standards concerning the guarded hot plate method:
NF EN 12939: Thermal performance of building materials and products – Determination of thermal resistance by the guarded hot plate method and the fluxmetric method – Thick products of high and medium thermal resistance
XP CEN / TS 15548-1: Thermal insulation products for building equipment and industrial installations – Determination of thermal resistance by the guarded hot plate method – Part 1: measurements at high temperature between 100 ° C and 850 ° C
NF EN 12664: Thermal performance of materials and products for building – Determination of thermal resistance by the guarded hot plate method and the flowmetric method – Dry and wet products of medium and low thermal resistance
NF EN 12667 (2001- 07-01): Thermal performance of building materials and products – Determination of thermal resistance by the guarded hot plate method and the fluxmetric method – Products of high and medium thermal resistance
NF X10-021 (1972-12-01 ): Weakly conductive materials – Determination of thermal conductivity Guarded hot plate method with symmetrical samples
EN 12939 (2001-03-01): Titre: Thermal performance of building materials and products – Determination of thermal resistance by the guarded hot plate method and the fluxmetric method – Thick products of high and medium thermal resistance
ISO 10291: 1994 (1994-09-15): Glass in construction. Determination of the thermal transmission coefficient U, in steady state of multiple glazing. Guarded hot plate method.
ISO 8302: 1991 (1991-08-01): Thermal insulation. Determination of thermal resistance and related properties in steady state. Guarded hot plate method.
Experimental device
Figures 2 and 3 show the mechanical device. Figure 2 shows the 2-sample device and Figure 3 the modification for a single sample.
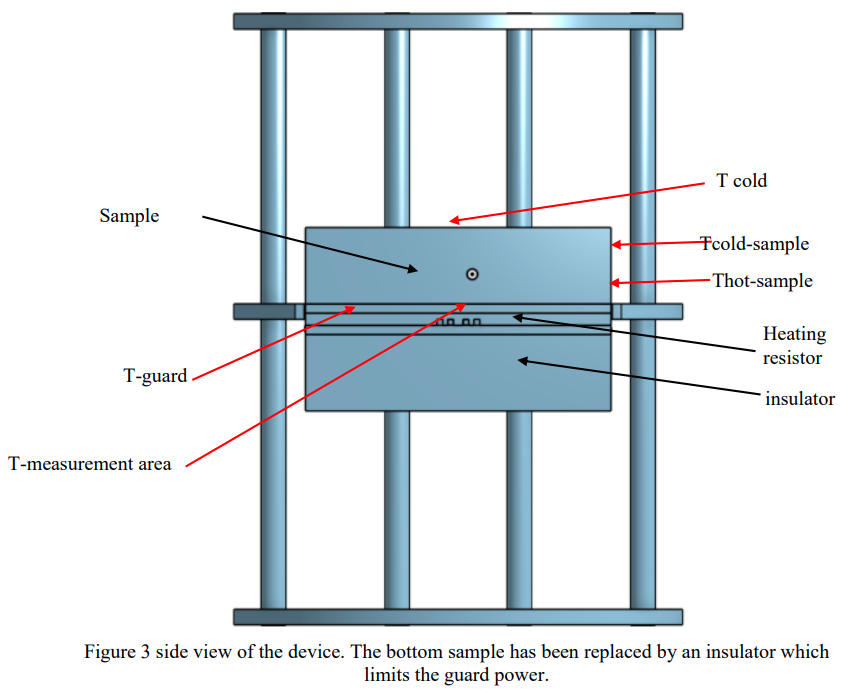
To allow better measurement the guarded hot plate has been modified to allow measurement with a single sample. In red the temperature measurement points (figure 2).
Indeed, the samples have different thermal resistances of more than 5%. In this case it is not possible to measure in the configuration with two samples. An additional piece of copper provides a rear guard under the guarded hot plate. In this way, it is the regulation which makes it possible to maintain an effective guard. Insulation has been added behind the guard to limit the power of the thermal guard.
As samples have a high conductivity, the contact resistances represent a significant measurement bias. To overcome this, the choice was made to drill the samples in order to measure the temperature in the thickness of the sample. This differs significantly from the guarded hot plate method but provides a much more reliable measurement.
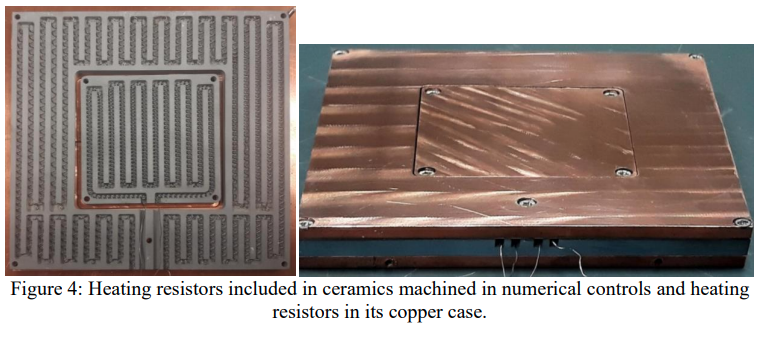
The heating resistances of the hot plate are made with resistive wire. This is placed in a ceramic plate machined in numerical control and ensures the heating of the measurement zone and of the guard zone (figure 4). Figure 5 shows the copper plates ensuring the maintenance of the heating resistance and optimal heat transmission.
The power is measured by a 4-wire device. The voltage is measured by a Keithley voltmeter, the current by a FLUKE 179 multimeter. The temperature is acquired by a FLUKE 54-2B temperature transmitter with calibration certificate. The uncertainty margins of these devices are negligible compared to other sources of uncertainty.
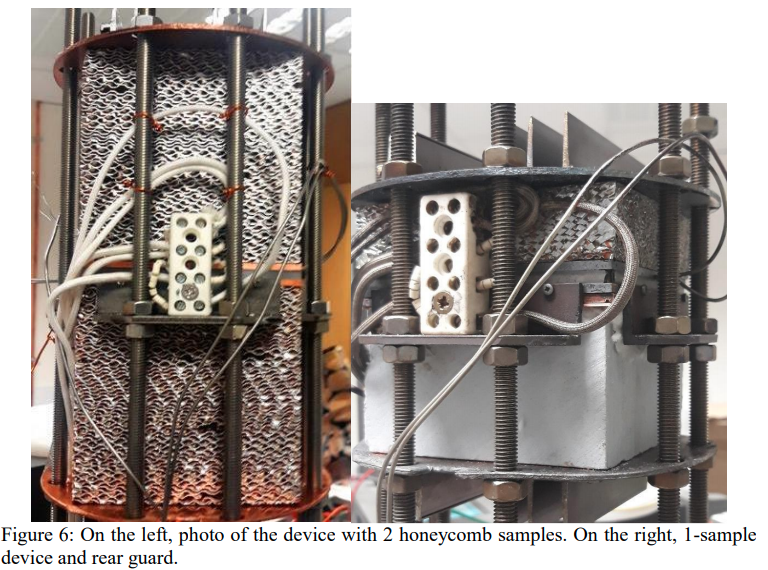
The power of the heating resistance is selected manually. Indeed, a regulation on the temperature would introduce permanent variations which would prevent being in stationary mode. A PID regulator regulates the guard. Figure 6 shows the 1 and 2 sample device. For the uncrushed samples, aluminum foil was put around them in order to prevent convection through the honeycomb structure.
The sample does not meet any specifications of any standard in force in an absolute way, the objective was to comply as well as possible with the standards in force, in particular the XP CEN / TS 15548 standard which is the only one to cover the requested temperature range. Uncertainties with a compliant sample cannot be below 14%. With a sample that is inhomogeneous, anisotropic and of too great a thickness in relation to its lateral dimensions, an uncertainty of less than 20% should not be considered.
Conclusion:
The measurements were made in the open air and in a tube furnace. The area of the guard zone is 3 times greater than the measurement zone.
The measurements confirmed a strong anisotropy of thermal conductivity: factor 15 between the conduction parallel and perpendicular to the aluminum foils.

